Introduction
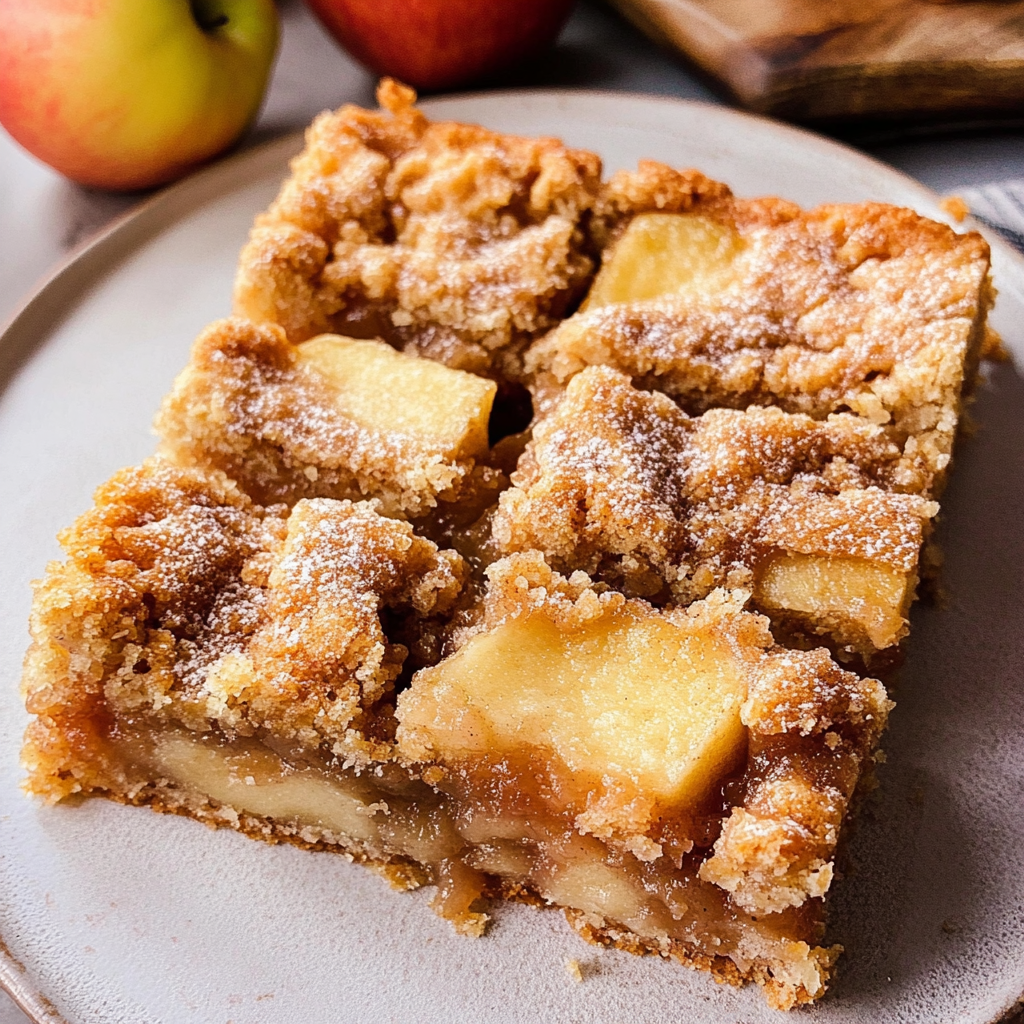
Nothing evokes the feeling of home quite like the warm aroma of apple pie wafting through the kitchen. These apple pie bars capture that nostalgic flavor in a portable, easy-to-enjoy format, making them perfect for gatherings or cozy family nights.
Combining the classic taste of apple pie with the convenience of bars, this recipe offers a delightful balance of sweet and tart. With a buttery crust and a spiced apple filling, these bars are bound to please everyone from the kids to the adults.
Ingredients
- 2 cups all-purpose flour
All-purpose flour is the foundation for the crust. It provides structure and binds the ingredients together, ensuring a firm yet tender base for the bars. - 1 cup unsalted butter
Butter not only adds richness and flavor but also helps create a flaky texture in the crust. Using unsalted butter allows you to control the saltiness of your recipe. - 1/2 cup granulated sugar
Granulated sugar sweetens the crust and enhances the overall flavors of the bars, complementing the natural sweetness of the apples. - 1/2 cup brown sugar
Brown sugar adds depth and a slight molasses flavor to the filling, enhancing the caramel notes of cooked apples. - 2 teaspoons cinnamon
Cinnamon is the star of the spice family in this recipe, bringing warmth and comfort that perfectly pairs with the apples. - 1/4 teaspoon nutmeg
Nutmeg adds a unique, aromatic touch that elevates the spiced flavor profile, making the filling even more enticing. - 1/4 teaspoon salt
Salt enhances the sweetness of the sugars and flavors of the apples while balancing the overall taste of the bars. - 4 cups peeled and chopped apples
Apples are the main feature of this recipe, providing texture, moisture, and natural sweetness. Choose a mix of tart and sweet apples for a well-rounded flavor. - 1 tablespoon lemon juice
Lemon juice prevents the apples from browning and adds a subtle tartness, which beautifully contrasts the sweetness of the sugars. - 1/4 cup oats
Oats provide a chewy texture in the topping, adding a wholesome element while complementing the other ingredients. - 1/4 cup chopped walnuts or pecans (optional)
Nuts offer a delightful crunch and additional flavor. Their inclusion is optional but highly recommended for those who enjoy a bit of added texture.
Directions & Preparation
Step 1: Preheat oven to 350°F (175°C).
Preheating the oven ensures even cooking, which is crucial for achieving a golden-brown crust and perfectly cooked apples. Always allow your oven to fully reach the desired temperature before placing your dish inside.
Step 2: Prepare the crust: In a mixing bowl, cream together the butter and sugars until fluffy. Add flour, salt, and stir until combined.
Creaming the butter and sugars together incorporates air, leading to a lighter crust. Be careful not to overmix after adding the flour, as this can make the crust tough.
Step 3: Press the dough into an 8×8-inch baking dish to form an even layer.
Pressing the dough evenly ensures a uniform bake and a consistent texture throughout the bars. A well-shaped crust gives the final product a professional appearance and enjoyable bite.
Step 4: Bake the crust for 15-20 minutes, or until lightly golden.
Baking the crust before adding the filling helps prevent it from becoming soggy. The light golden color indicates that the crust is partially cooked but still has a soft texture.
Step 5: In another bowl, toss together the apples, lemon juice, cinnamon, nutmeg, and salt.
Tossing the apples with lemon juice and spices before baking allows the flavors to meld together. This step is essential for ensuring each bite is packed with flavor.
Step 6: Spread the apple mixture evenly over the pre-baked crust.
Evenly distributing the apple filling ensures that every bar has a balanced amount of fruit, making each bite equally delicious. It also helps with the overall appearance, providing a nice layer on top of the crust.
Step 7: Combine the oats and nuts (if using) with the remaining crust mixture and sprinkle over the apples.
This topping adds texture and flavor, enhancing the complexity of the dessert. The oats will give a chewy element, while the nuts bring a nice crunch.
Step 8: Return the dish to the oven and bake for 25-30 minutes, or until the apples are tender and the topping is golden brown.
Baking for this duration allows the apples to soften and meld with the topping. Keep an eye on them towards the end to prevent overbrowning.
Step 9: Remove from the oven and let cool before slicing into bars.
Cooling the bars allows them to set properly. If you cut them too soon, they may fall apart, so patience is crucial for creating perfectly shaped bars.
Step 10: Serve warm or at room temperature, optionally with whipped cream or ice cream.
Serving these apple pie bars warm accentuates their flavors and makes for a comforting experience. Pairing them with whipped cream or ice cream takes them to another level, adding creaminess to the sweet and spiced apple filling.

Selecting the Right Apples for Baking
Choosing the right type of apples is key to the success of your pie bars. For a perfect blend of sweetness and tartness, opt for a mix of Granny Smith and Honeycrisp apples. Granny Smith offers a tart bite that balances the sugars, while Honeycrisp adds natural sweetness and a juicy texture. Avoid overly soft varieties, as they may turn mushy during baking.
The Importance of Chilling Your Dough
Chilling your dough before baking can make a significant difference in the texture of the crust. When the butter is cold, it creates a flakier result by preventing it from melting too quickly in the oven. This step could mean the contrast between a tender crust and a dense one, ensuring that your apple pie bars have that perfect bite.
Creative Variations to Try
Feel free to get creative with your apple pie bars! Adding a handful of dried cranberries or raisins to the filling introduces a delightful sweetness and chewiness. For a flavor twist, consider mixing in a tablespoon of almond extract with the apples. If you're a fan of caramel, a drizzle of homemade caramel sauce on top before serving can elevate the dessert into an indulgent treat.
FAQs
What can I do if my apple filling is too watery?
If the filling appears watery, consider mixing in a tablespoon of cornstarch with the apples before baking. This helps thicken the juices as they cook.
Can I substitute other fruits in this recipe?
Yes, you can substitute other fruits like pears or berries for a different flavor profile, but keep in mind that their moisture content may vary.
What if my crust turns out too crumbly?
A crumbly crust may result from too much flour or insufficient moisture. Add a bit of cold water, one tablespoon at a time, until the mixture holds together.
How can I prevent the bars from being too sweet?
To balance sweetness, reduce the amount of granulated sugar slightly and use tart apples. This will bring harmony to the overall flavor.
What kind of toppings work well with apple pie bars?
Top with a scoop of vanilla ice cream or a dollop of whipped cream for added richness. You could also sprinkle some additional cinnamon or caramel sauce.
Can I add spices other than cinnamon and nutmeg?
Certainly! Feel free to experiment with allspice or ginger for an extra layer of warmth and complexity in your filling.
Conclusion
These apple pie bars are a delightful way to enjoy the classic flavors of apple pie in a more approachable form. Perfect for gatherings, as a lunchbox treat, or simply for an afternoon snack, they bring comfort and joy with each bite.
With a simple recipe and room for variations, you can make these bars your own. Whether enjoyed warm or at room temperature, they promise smiles all around—happy baking!
Recipe Card

Deliciously Simple Apple Pie Bars for Every Occasion
Ingredients
Method
- Preheat oven to 350°F (175°C).
- Prepare the crust: In a mixing bowl, cream together the butter and sugars until fluffy. Add flour, salt, and stir until combined.
- Press the dough into an 8x8-inch baking dish to form an even layer.
- Bake the crust for 15-20 minutes, or until lightly golden.
- In another bowl, toss together the apples, lemon juice, cinnamon, nutmeg, and salt.
- Spread the apple mixture evenly over the pre-baked crust.
- Combine the oats and nuts (if using) with the remaining crust mixture and sprinkle over the apples.
- Return the dish to the oven and bake for 25-30 minutes, or until the apples are tender and the topping is golden brown.
- Remove from the oven and let cool before slicing into bars.
- Serve warm or at room temperature, optionally with whipped cream or ice cream.
Notes
Additional serving suggestions: pair with a crisp salad, garlic bread, or roasted seasonal vegetables for balance.
For make-ahead, prep components separately and assemble just before heating to preserve texture.
Taste and adjust with acid (lemon/vinegar) and salt right at the end to wake up flavors.