Introduction
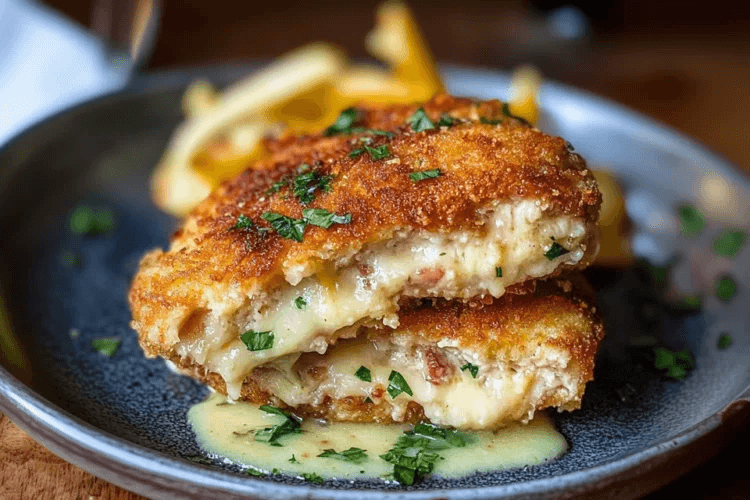
Chicken Kiev is a classic dish that brings together tender chicken breasts and a rich, buttery filling, creating a delightful meal that impresses without overwhelming the cook. The golden, crispy exterior conceals a luscious interior, making every bite a rewarding experience.
While it may seem fancy, Chicken Kiev is surprisingly easy to prepare at home. With a few straightforward steps and simple ingredients, you can serve up this restaurant-quality dish for your family or guests. Whether it's a special occasion or a cozy dinner, this recipe will have everyone coming back for seconds.
Ingredients
- 4 boneless, skinless chicken breasts
- ½ cup unsalted butter, softened
- 2 cloves garlic, minced
- 2 tablespoons fresh parsley, finely chopped
- 1 tablespoon fresh dill, finely chopped
- 1 teaspoon lemon juice
- 1 teaspoon salt
- ½ teaspoon black pepper
- ½ cup all-purpose flour
- 2 large eggs, beaten
- 1 cup panko breadcrumbs
- ½ teaspoon paprika
- ½ cup vegetable oil for frying
Directions & Preparation
- Begin by preparing the herb butter. In a mixing bowl, combine the softened butter, minced garlic, parsley, dill, lemon juice, salt, and black pepper. Mix thoroughly until well combined.
- Next, lay a sheet of plastic wrap on a clean surface. Place one chicken breast on the wrap, cover it with another piece of plastic, and gently pound it to about ½-inch thickness using a meat mallet or rolling pin. Repeat this process with the remaining chicken breasts.
- Take a portion of the prepared herb butter (about 2 tablespoons) and place it in the center of each flattened chicken breast. Fold the sides over the butter, then roll the chicken tightly, ensuring the butter is well enclosed. Secure the ends with toothpicks if necessary, and repeat with all chicken breasts.
- Once all the chicken is prepared, place them in the refrigerator for at least 30 minutes. This helps the butter firm up, making it less likely to leak during cooking.
- In three separate shallow dishes, set up a breading station. In the first dish, place the flour. In the second, add the beaten eggs. In the third, combine the panko breadcrumbs and paprika.
- Remove the chicken from the refrigerator and season each piece lightly with salt and pepper. Dredge each chicken roll first in flour, shaking off any excess. Then dip it into the beaten eggs before coating it in the panko mixture, pressing gently to adhere.
- In a large skillet, heat the vegetable oil over medium-high heat. Once hot, carefully add the chicken rolls to the pan, ensuring not to overcrowd. Cook for about 4-5 minutes on each side, or until the outside is golden brown and crispy, and the chicken is cooked through.
- Once cooked, transfer the Chicken Kiev to a plate lined with paper towels to absorb any excess oil. Let them rest for a few minutes before serving, allowing the butter to settle.

FAQs
What can I do if the butter leaks out while cooking?
Make sure to chill the chicken rolls for at least 30 minutes before frying; this firms up the butter. Additionally, ensure the rolls are tightly secured when rolling them up.
Can I use other herbs instead of parsley and dill?
Absolutely! Feel free to mix in your favorite herbs, such as basil or thyme, to customize the flavor of the herb butter.
What is the best oil to use for frying?
Vegetable oil is a great choice due to its high smoke point. Other options include canola oil or sunflower oil, which also perform well for frying.
Can I bake Chicken Kiev instead of frying it?
Yes, you can bake Chicken Kiev at 375°F (190°C) for about 25-30 minutes. Brush the rolls with oil before baking for a golden finish.
What if my chicken is overcooked?
To avoid overcooking, use a meat thermometer to check for an internal temperature of 165°F (74°C). Remove from heat immediately once it reaches this temperature.
How can I scale this recipe for a larger group?
Simply double or triple the quantities of all the ingredients. Ensure you have enough space in your refrigerator for chilling the rolled chicken.
What sides pair well with Chicken Kiev?
Consider serving it with a fresh salad, mashed potatoes, or steamed vegetables for a balanced meal that complements the richness of the chicken.
Can I prepare the herb butter in advance?
Yes, you can make the herb butter up to a week in advance. Just store it in the refrigerator, wrapped tightly in plastic wrap.
Conclusion
Chicken Kiev is a comforting dish that can elevate any meal without requiring hours in the kitchen. With its crispy exterior and melting herb butter, this recipe is sure to become a favorite in your home.
The next time you're looking for a delightful dinner option, remember this easy Chicken Kiev recipe. It's a delicious way to impress your family and friends with your cooking skills, while also enjoying the process of making a classic dish.
Recipe Card
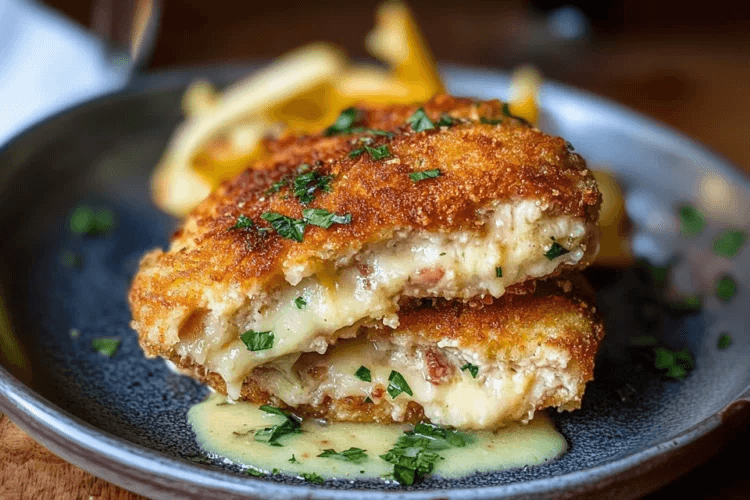
Deliciously Easy Chicken Kiev Recipe for Home Cooks
Ingredients
Method
- Begin by preparing the herb butter. In a mixing bowl, combine the softened butter, minced garlic, parsley, dill, lemon juice, salt, and black pepper. Mix thoroughly until well combined.
- Next, lay a sheet of plastic wrap on a clean surface. Place one chicken breast on the wrap, cover it with another piece of plastic, and gently pound it to about ½-inch thickness using a meat mallet or rolling pin. Repeat this process with the remaining chicken breasts.
- Take a portion of the prepared herb butter (about 2 tablespoons) and place it in the center of each flattened chicken breast. Fold the sides over the butter, then roll the chicken tightly, ensuring the butter is well enclosed. Secure the ends with toothpicks if necessary, and repeat with all chicken breasts.
- Once all the chicken is prepared, place them in the refrigerator for at least 30 minutes. This helps the butter firm up, making it less likely to leak during cooking.
- In three separate shallow dishes, set up a breading station. In the first dish, place the flour. In the second, add the beaten eggs. In the third, combine the panko breadcrumbs and paprika.
- Remove the chicken from the refrigerator and season each piece lightly with salt and pepper. Dredge each chicken roll first in flour, shaking off any excess. Then dip it into the beaten eggs before coating it in the panko mixture, pressing gently to adhere.
- In a large skillet, heat the vegetable oil over medium-high heat. Once hot, carefully add the chicken rolls to the pan, ensuring not to overcrowd. Cook for about 4-5 minutes on each side, or until the outside is golden brown and crispy, and the chicken is cooked through.
- Once cooked, transfer the Chicken Kiev to a plate lined with paper towels to absorb any excess oil. Let them rest for a few minutes before serving, allowing the butter to settle.
Notes
Additional serving suggestions: pair with a crisp salad, garlic bread, or roasted seasonal vegetables for balance.
For make-ahead, prep components separately and assemble just before heating to preserve texture.
Taste and adjust with acid (lemon/vinegar) and salt right at the end to wake up flavors.
