Introduction
Is there any dessert more universally joyful than a Rice Krispie Treat? That perfect combination of crispy, airy cereal held together by a sweet, marshmallowy binder is a textural dream. The best part? That iconic snap, crackle, and pop you hear with every bite is a sound of pure, simple happiness. This Rice Krispie Treats Recipe is the ultimate no-bake dessert, delivering that classic, gooey, and crispy texture we all know and love. Did you know that Rice Krispie Treats were invented in 1939 by two home economists at Kellogg’s as a fundraiser for the Camp Fire Girls? They’ve been a beloved American treat for generations! This recipe is special because it strips the process down to its absolute essentials: just three ingredients and ten minutes of your time. It’s the perfect, foolproof project to make with kids, creating sweet memories in the kitchen without any fuss. If you love the simplicity of our 3-Ingredient Peanut Butter Cookies, you’ll adore this even easier, no-oven-required treat. Get ready to make the easiest, most delicious Rice Krispie Treats Recipe you’ll ever try!
What is a Rice Krispie Treats Recipe?
So, what’s the story behind this wonderfully straightforward name? Is it a recipe for a treat made with Rice Krispies? Well, yes! But its brilliance is in its simplicity. The name tells you everything you need to know, yet the result feels like magic. How can just three simple things—marshmallows, cereal, and butter—create something so incredibly addictive? The magic is in the melted marshmallow, which acts as a sticky, sweet glue that sets into a perfect, chewy square. I once brought a batch to a neighborhood potluck, and they were the first thing to disappear, with adults and kids alike asking, “How did you make these so good?” They say the way to a person’s heart is through their stomach, and a homemade pan of these treats is a surefire path to success. Why not grab a spatula and see for yourself?
Why You’ll Love This Rice Krispie Treats Recipe:
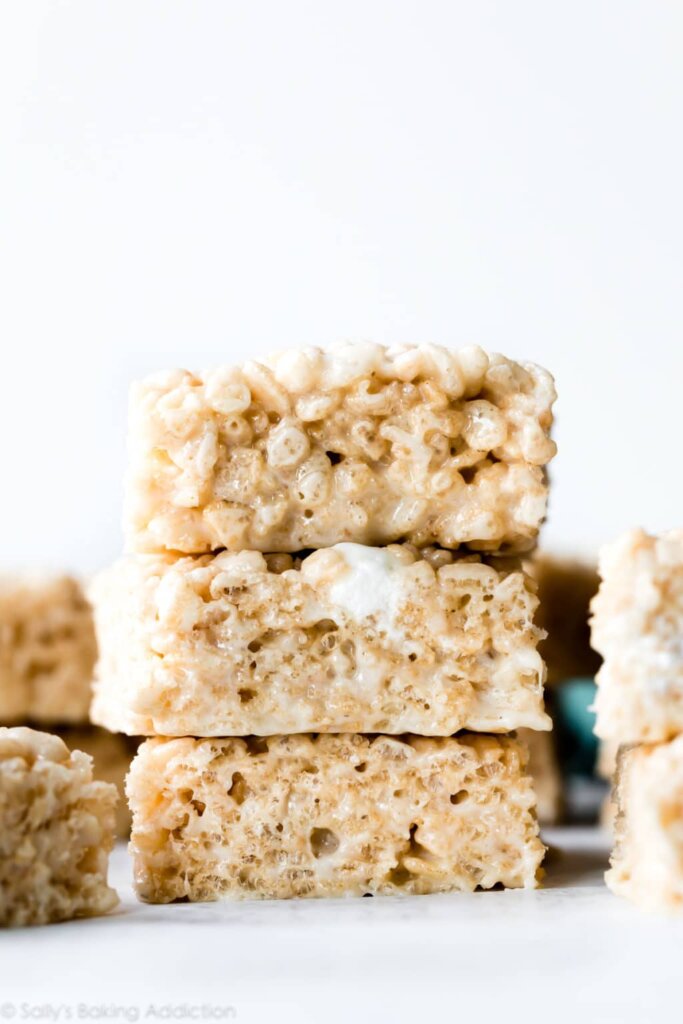
You are going to be absolutely thrilled with this recipe, and here’s exactly why. First and foremost, the main highlight is its unbelievable simplicity and perfect texture. We’re talking about a three-ingredient, one-pot recipe that comes together in ten minutes flat. The result is a treat that is gloriously gooey, perfectly sweet, and satisfyingly crisp. It’s the kind of no-fuss dessert that feels like a major accomplishment with minimal effort Rice Krispie Treats Recipe.
Secondly, let’s talk about the fantastic cost-saving benefit. A box of pre-made Rice Krispie Treats from the store can be surprisingly expensive for what you get. Making a whole thick, generous pan at home for a fraction of the cost means you can have a wholesome, homemade snack on hand anytime, and it’s incredibly budget-friendly for parties and bake sales.
Finally, the endless customization is what makes this recipe a forever favorite. While the classic version is perfection, it’s also a blank canvas for your creativity. Stir in sprinkles, dip them in chocolate, or add a pinch of sea salt to create your own signature treat. If you enjoy the fun of customizing no-bake desserts like our No-Bake Energy Bites, you’ll love this classic. Ready to make some magic in ten minutes? Let’s get started!
Table of Contents
How to Make Rice Krispie Treats Recipe:
● Quick Overview
This is the easiest, most foolproof dessert you will ever make. It requires just 10 minutes of active prep and 3 simple ingredients for a result that is sweet, chewy, crispy, and utterly satisfying. The total time, including setting, is about 1 hour.
Ingredients for Rice Krispie Treats Recipe
- 6 cups Rice Krispies cereal
- 10 oz bag of marshmallows (about 40 regular marshmallows)
- 3 tablespoons unsalted butter
Step-by-Step Instructions
- Prep Your Pan: Start by greasing a 9×13 inch baking dish with a little butter or non-stick spray. This will prevent the treats from sticking and make for easy removal and slicing.
- Melt the Butter and Marshmallows: In a large pot, melt the 3 tablespoons of butter over low heat. Once melted, add the entire bag of marshmallows.
- Stir Until Smooth: Stir the marshmallows constantly as they melt. Keep the heat low to prevent the sugar from burning. Continue stirring until the mixture is completely smooth and no lumps remain.
- Remove From Heat: As soon as the marshmallow mixture is smooth, immediately remove the pot from the heat. This is a crucial step to ensure your treats stay soft and chewy.
- Add the Cereal: Quickly add the 6 cups of Rice Krispies cereal to the pot with the melted marshmallow. Using a greased spatula (this prevents sticking!), gently fold the cereal into the marshmallow mixture until every piece is evenly coated.
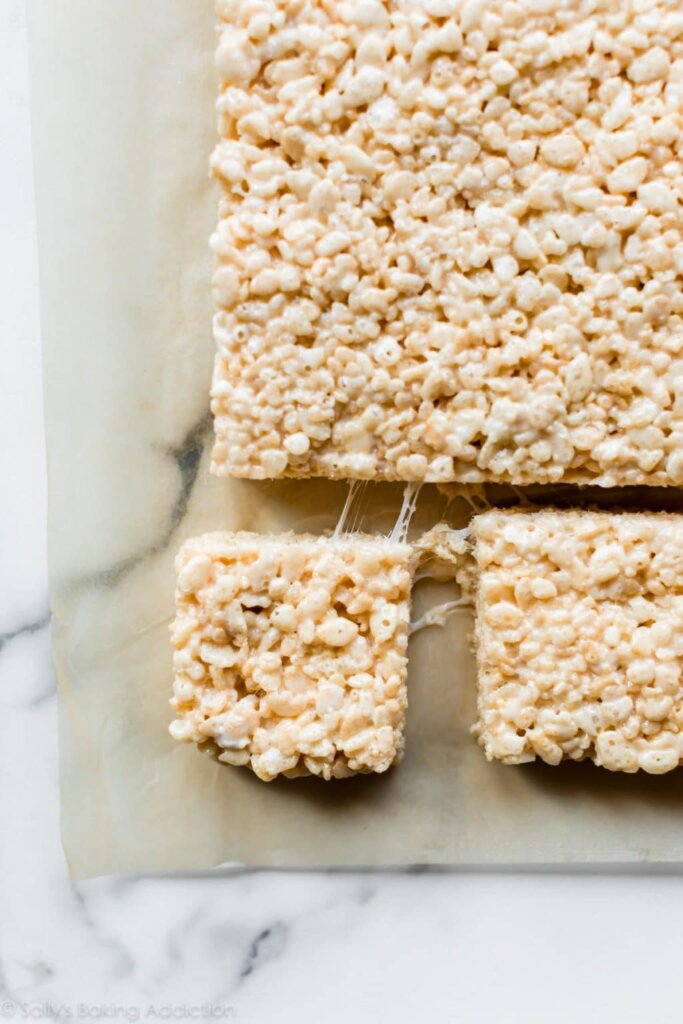
- Press Into Pan: Transfer the mixture to your prepared baking dish. Use the greased spatula, or your hands lightly greased with butter, to press the mixture firmly and evenly into the pan. Pressing firmly is key to getting treats that hold their shape when cut.
- Cool and Set: Allow the treats to cool at room temperature for at least 1 hour until they are firm to the touch.
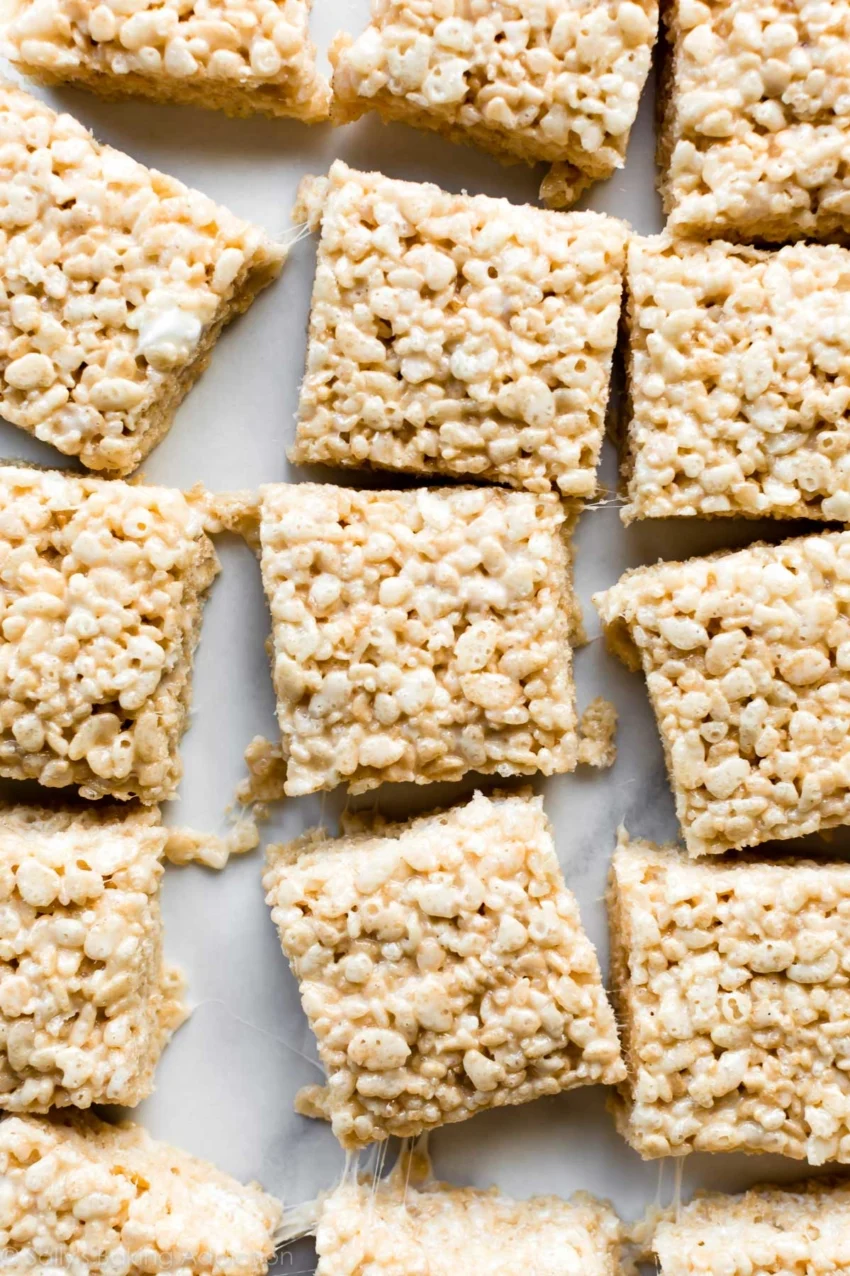
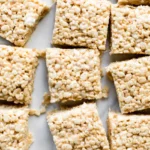
- Slice and Serve: Once completely set, turn the slab out onto a cutting board and slice into squares with a sharp knife Rice Krispie Treats Recipe.
What to Serve Rice Krispie Treats With
These treats are fantastic on their own, but they are part of the ultimate fun dessert spread!
- A Cold Glass of Milk: The classic pairing that never fails Rice Krispie Treats Recipe.
- Ice Cream: Crumble a treat over a bowl of vanilla ice cream for a fantastic sundae topping.
- Hot Chocolate: They are the perfect sweet snack to enjoy with a warm mug of cocoa on a cozy day.
- A Fruit Platter: Serve them alongside fresh fruit like strawberries and bananas for a party platter.
Top Tips for Perfecting Rice Krispie Treats Recipe
- Use Fresh Marshmallows: Older, stale marshmallows don’t melt as well and can make your treats tough.
- Low and Slow is Key: Always melt the marshmallows over low heat. High heat will cause them to seize up and become hard and chewy instead of soft and gooey.
- Grease Your Utensils: Greasing your spatula and your hands before pressing the mixture into the pan will make the process infinitely easier and less messy.
- Press, Don’t Pack: Press the mixture firmly into the pan, but avoid compacting it so much that the treats become dense and hard Rice Krispie Treats Recipe.
Storing and Reheating Tips
These treats store beautifully at room temperature.
- Counter: Store the treats in an airtight container at room temperature for up to 3 days. They are best enjoyed within the first 48 hours for optimal softness.
- Freezing: You can freeze Rice Krispie Treats for up to 6 weeks. Wrap individual squares tightly in plastic wrap and place them in a freezer bag. Thaw at room temperature for about 30 minutes before serving.
- Reheating: This is a no-bake treat meant to be enjoyed at room temperature. Do not reheat them. If they become stale, they are wonderful crumbled over ice cream or yogurt Rice Krispie Treats Recipe.
Best Rice Krispie Treats Recipe: 3 Ingredients, 10 Minutes
Make perfect Rice Krispie Treats with just 3 ingredients in 10 minutes! This easy no-bake recipe creates gooey, crispy homemade treats. Get the recipe!
Ingredients
-
6 cups Rice Krispies cereal
-
10 oz bag of marshmallows (about 40 regular marshmallows)
-
3 tablespoons unsalted butter
Instructions
-
Prep Your Pan: Start by greasing a 9×13 inch baking dish with a little butter or non-stick spray. This will prevent the treats from sticking and make for easy removal and slicing.
-
Melt the Butter and Marshmallows: In a large pot, melt the 3 tablespoons of butter over low heat. Once melted, add the entire bag of marshmallows.
-
Stir Until Smooth: Stir the marshmallows constantly as they melt. Keep the heat low to prevent the sugar from burning. Continue stirring until the mixture is completely smooth and no lumps remain.
-
Remove From Heat: As soon as the marshmallow mixture is smooth, immediately remove the pot from the heat. This is a crucial step to ensure your treats stay soft and chewy.
-
Add the Cereal: Quickly add the 6 cups of Rice Krispies cereal to the pot with the melted marshmallow. Using a greased spatula (this prevents sticking!), gently fold the cereal into the marshmallow mixture until every piece is evenly coated.
-
Press Into Pan: Transfer the mixture to your prepared baking dish. Use the greased spatula, or your hands lightly greased with butter, to press the mixture firmly and evenly into the pan. Pressing firmly is key to getting treats that hold their shape when cut.
-
Cool and Set: Allow the treats to cool at room temperature for at least 1 hour until they are firm to the touch.
-
Slice and Serve: Once completely set, turn the slab out onto a cutting board and slice into squares with a sharp knife.