Introduction
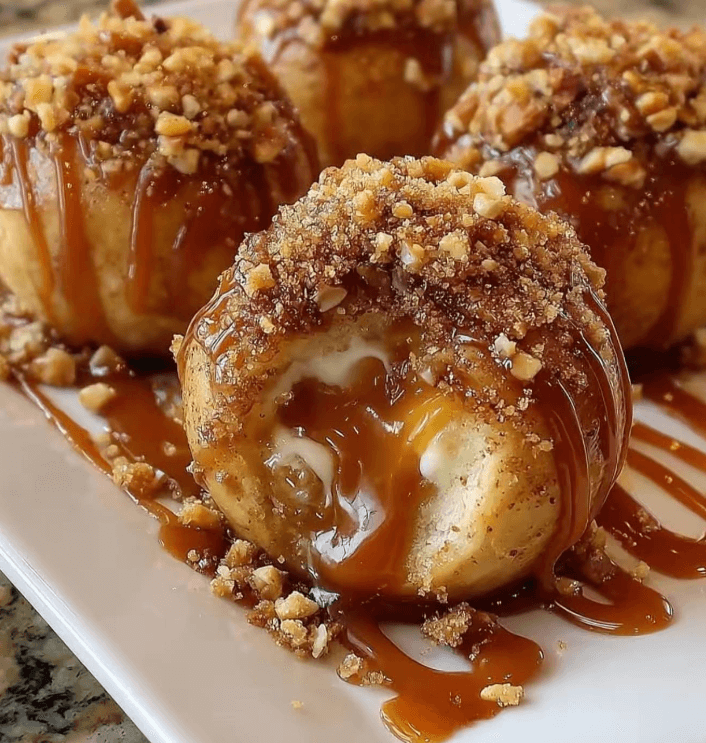
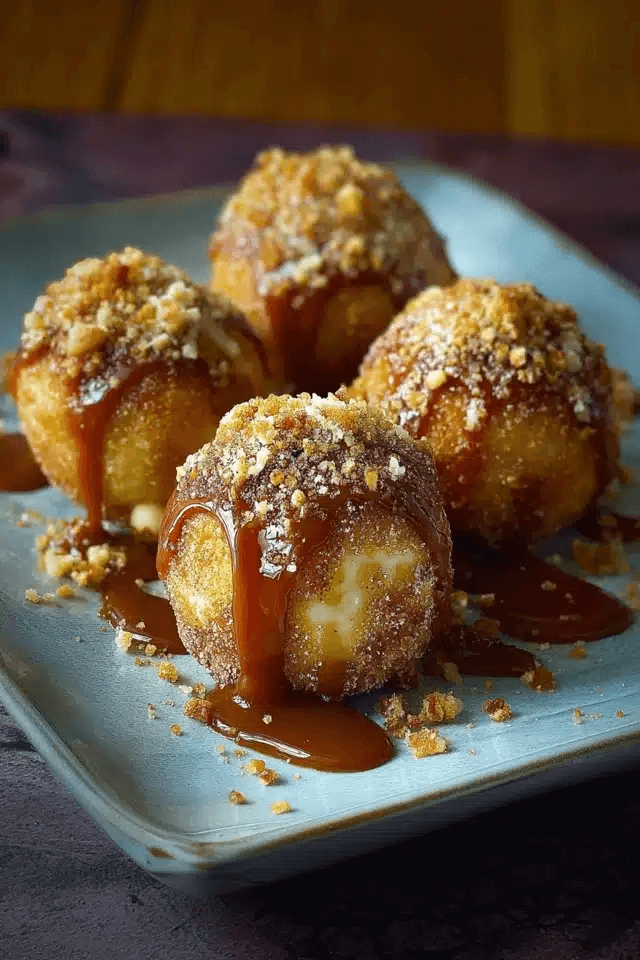
Picture this: a crisp autumn evening, the air fragrant with the scent of apples and spices, as you indulge in a delicious dessert. Apple Caramel Bombs bring together the tender sweetness of apples and the rich, buttery flavors of caramel, wrapped in a flaky pastry. This delightful treat is perfect for any occasion, whether it's a family gathering or a cozy night in.
Creating these Apple Caramel Bombs is an experience in itself. As you prepare each layer, you're not just cooking, but crafting a dish that tells the story of comfort and warmth. The combination of tart and sweet apples combined with the luscious caramel creates a balance that will keep your taste buds wanting more.
With a few simple ingredients and some patience, you'll be able to present these beautiful pastries that not only taste amazing but also look impressive. So roll up your sleeves and get ready to amaze yourself and those you love with this irresistible treat.
Ingredients
- 2 large apples, peeled and diced
Choose firm apples such as Granny Smith or Honeycrisp for a perfect balance of sweetness and tartness. Their texture also holds up well during baking. - 1 cup caramel sauce
Store-bought or homemade, caramel sauce adds a rich, buttery sweetness that complements the apples beautifully. It also provides a gooey center that melts in your mouth. - 1 sheet puff pastry, thawed
Puff pastry is key for creating that flaky exterior. Make sure to handle it gently to maintain its layers and lightness. - 1 teaspoon ground cinnamon
This spice enhances the apple flavor and gives a warm, cozy aroma, perfect for fall desserts. - 1 tablespoon sugar
Sprinkling sugar on the pastries before baking creates a delightful caramelized crust that adds to the overall texture and sweetness. - 1 egg, beaten
The egg wash gives the pastries a golden-brown color and a glossy finish, making them look irresistible right out of the oven.
Directions & Preparation
Step 1: Preheat the oven to 400°F (200°C).
Preheating the oven is crucial for achieving the perfect puff pastry texture. A hot oven creates steam in the layers of pastry, ensuring they rise beautifully and become flaky.
Step 2: Prepare the apples by peeling and dicing them into small pieces.
Cutting the apples into uniform pieces ensures even cooking and allows for better caramel integration. Diced apples mix well with the caramel, ensuring each bite is a harmonious blend of flavors.
Step 3: In a bowl, mix the diced apples with cinnamon and half of the caramel sauce.
This step combines the flavors, allowing the apples to absorb the spices and caramel. The sugar in the caramel will begin to draw out moisture from the apples, creating a luscious filling.
Step 4: Roll out the puff pastry on a lightly floured surface and cut it into squares.
Rolling out the pastry helps to thin it slightly, making it easier to wrap the apples. Cutting even squares ensures all the bombs will bake uniformly, which helps with presentation.
Step 5: Place a spoonful of the apple mixture in the center of each square.
This is the heart of the Apple Caramel Bombs. Be careful not to overfill, as the pastry needs to enclose the filling completely for even cooking and to keep the gooeyness inside.
Step 6: Add a drizzle of the remaining caramel sauce on top of the apple mixture.
This layer of caramel ensures a rich flavor throughout the pastry and adds an extra gooey surprise in the middle that enhances the overall indulgence.
Step 7: Fold the corners of the pastry over the filling and pinch to seal.
Sealing the pastries tightly is essential to prevent leaks while baking. Make sure the edges are pressed firmly together to hold the delicious filling during cooking.
Step 8: Place the sealed pastries on a baking tray lined with parchment paper.
Using parchment paper prevents sticking and promotes even baking, allowing the pastries to achieve their perfect golden-brown color.
Step 9: Brush the tops with beaten egg and sprinkle with sugar.
This final touch promotes shiny, golden tops and a sweet crust. The sugar caramelizes during baking, adding to the delightful texture.
Step 10: Bake for 20-25 minutes or until golden brown and puffed up.
Watching the pastries as they rise is a rewarding part of baking. They should puff and turn a beautiful golden hue, signaling that they're ready to be taken out of the oven.
Step 11: Allow cooling for a few minutes before serving.
Letting them cool prevents burns from the hot filling and allows the flavors to settle. It also makes handling easier when serving.
Choosing the Right Apples for Baking
When it comes to baking, not all apples are created equal. Firm varieties like Granny Smith and Fuji hold their shape during cooking, making them ideal for recipes that require a bit of bite. Their natural tartness balances the sweetness of caramel and protects against overly mushy filling.
Mastering the Puff Pastry
Puff pastry can seem intimidating, but it’s essential for achieving that flaky and crispy texture. Always keep the pastry cold until just before using, as heat can render it floppy. Rolling it out evenly and handling it minimally helps retain the airiness needed for the perfect Apple Caramel Bombs.
Personalizing Your Caramel Filling
Feel free to add a personal touch to the caramel filling. A pinch of nutmeg or a splash of vanilla extract can enhance the flavor complexity. For an adult twist, consider infusing the caramel with bourbon or rum for a deeper richness that elevates the dessert.
FAQs
What if my pastry doesn't puff up?
If your pastry doesn’t puff up, it may have been too warm when it was placed in the oven, or it might have been rolled too thin. Ensuring a cold initial state and proper thickness can help.
Can I use a different type of filling?
Yes, you can experiment with fillings. Pears or a mix of berries can provide a delightful variation while maintaining the essence of a fruit and caramel dessert.
How do I prevent the pastries from leaking during baking?
Make sure to seal the edges well and avoid overfilling. A tight pinch and double-checking for any openings can help keep your caramel from escaping.
What type of caramel is the best for these bombs?
A thicker caramel sauce works best to prevent it from melting all the way through during baking. Homemade caramel sauce can often achieve this texture.
Can I incorporate spices other than cinnamon?
Certainly! Nutmeg, allspice, or ginger can enhance the flavor profile, providing warmth and complexity that works wonderfully with apples.
My caramel turned out too runny; how can I fix this?
If the caramel is too runny, it may need to be cooked a bit longer to thicken up. A small amount of cornstarch mixed with a bit of water can help if you're in a hurry.
Conclusion
Apple Caramel Bombs are more than just a dessert; they are a celebration of seasonal flavors wrapped in a warm, flaky crust. The process might seem a bit lengthy, but the outcome is undoubtedly worth the effort — a deliciously satisfying treat that brings joy with each bite.
So, gather your loved ones, share your creations, and enjoy every moment. The smiles that follow these indulgences will remind you why homemade delights are cherished traditions in the heart of cooking.
Recipe Card

Irresistible Apple Caramel Bombs to Delight Your Tastebuds
Ingredients
Method
- Preheat your oven to 400°F (200°C).
- Prepare the apples by peeling, coring, and chopping them into small pieces.
- In a saucepan, combine the granulated sugar and heat over medium until it melts.
- Add butter and, once melted, carefully pour in the heavy cream.
- Stir in the vanilla extract and salt, then allow the caramel to cool slightly.
- In a mixing bowl, combine the chopped apples with a bit of the cooled caramel.
- Roll out the puff pastry on a lightly floured surface.
- Cut the puff pastry into squares and fill each with apple mixture, then drizzle with more caramel.
- Fold the pastry corners over the filling, sealing with a pinch, and place on a baking sheet.
- Brush the tops with egg wash for color and shine, then bake for 20-25 minutes.
- Let cool before serving to avoid burns, and enjoy.
Notes
Additional serving suggestions: pair with a crisp salad, garlic bread, or roasted seasonal vegetables for balance.
For make-ahead, prep components separately and assemble just before heating to preserve texture.
Taste and adjust with acid (lemon/vinegar) and salt right at the end to wake up flavors.